> ## Documentation Index
> Fetch the complete documentation index at: https://ionet-cca8037f-confidential-compute.mintlify.site/llms.txt
> Use this file to discover all available pages before exploring further.
# Deploy Cluster and Pay
### Deploy Cluster and Pay with \$IO Coin
If you don't have any funds in your account, you can still deploy a cluster and pay for it at the end of the process. In this example, we pay with **\$IO Coin**.
#### 1. Pay
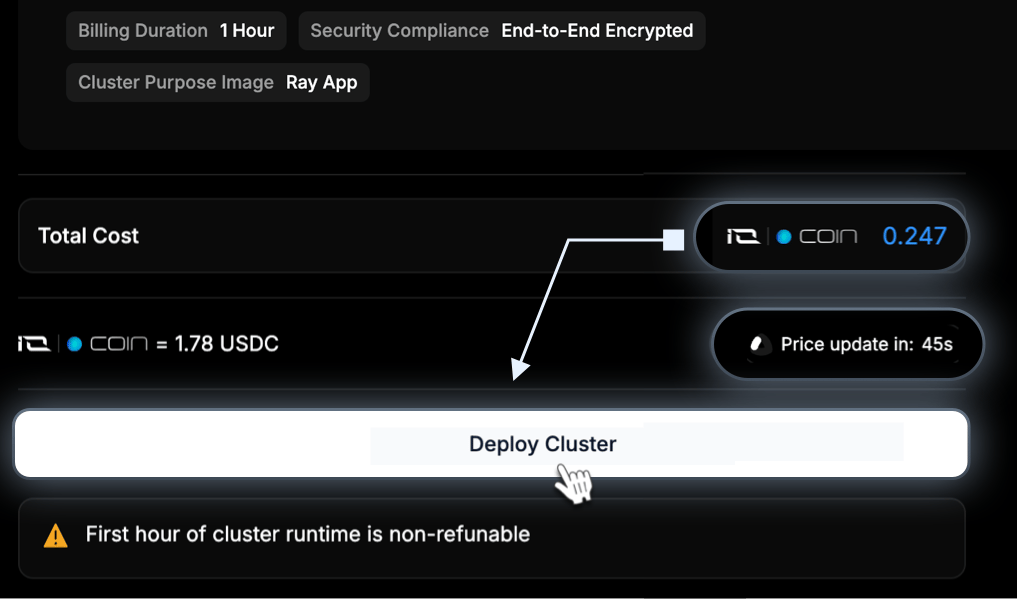
1. Complete the steps to deploy a cluster, and on the final Summary step, select “Pay with \$IO Coin”. Please note that if you choose \$IO coins as payment for the cluster, the **conversion rate updates every minute** based on the exchange rate.
 If you are satisfied with the current rate, click **Deploy Cluster** at the bottom of the Summary step.
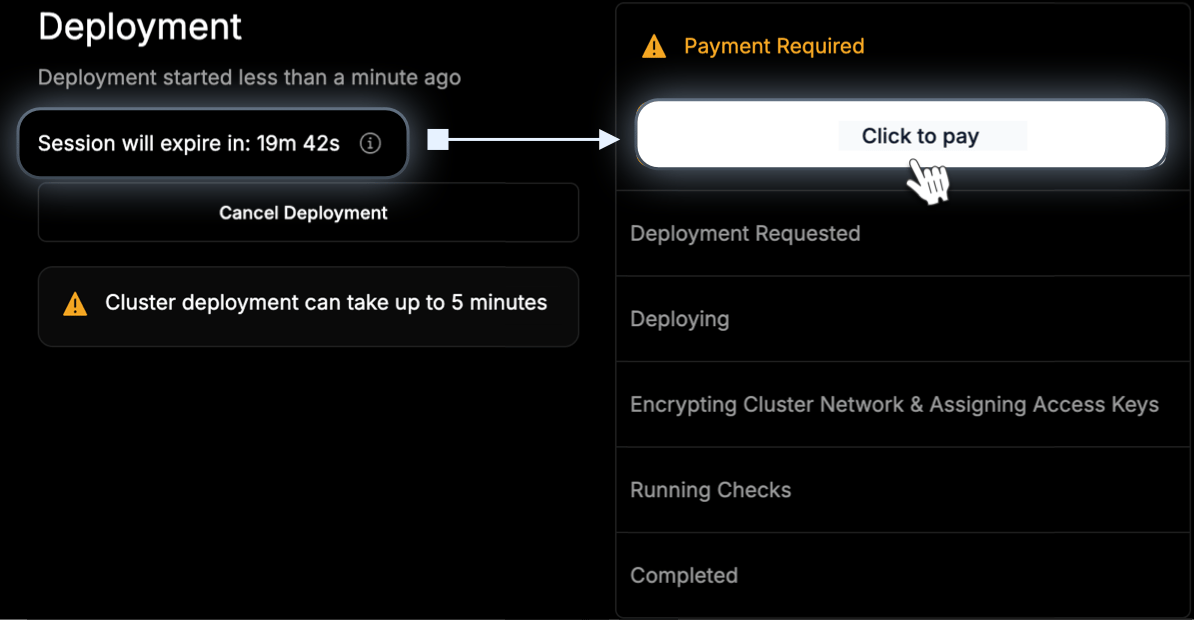
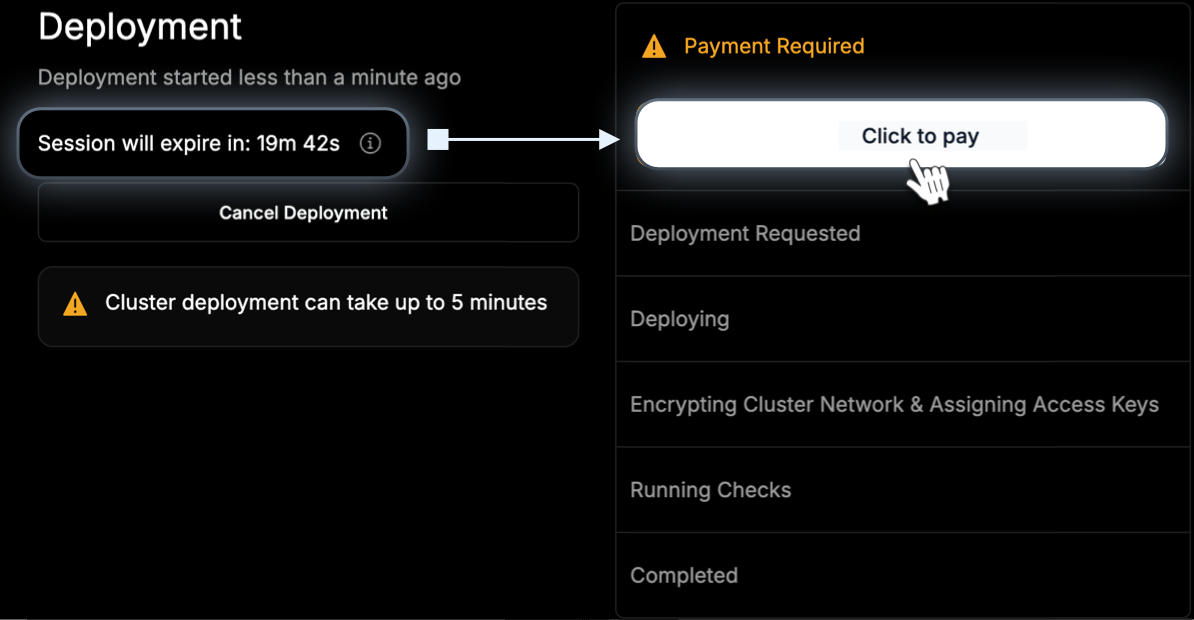
 2. At the end of the deploy process, click **Click to pay button.** Please note that if payment isn't completed **within 20 minutes**, the cluster creation session will end, and the **cluster will be destroyed**. You'll then be redirected to the previous step to confirm the details and create the cluster again.
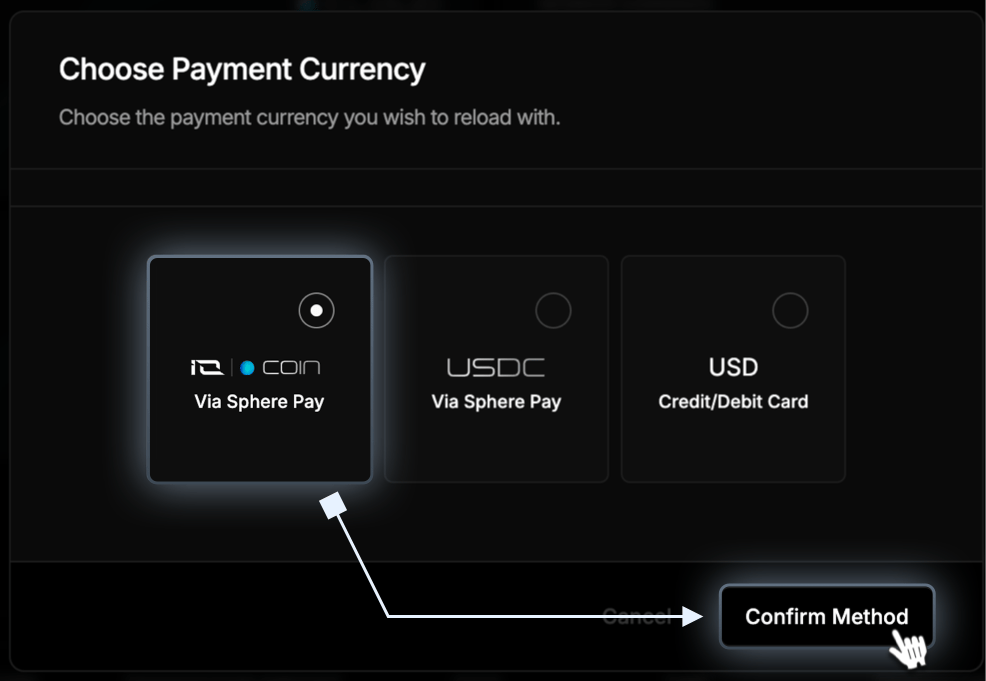
 3. In the **Payment Currency** dialog, you select **IO Coin** (via Sphere Pay). After selecting your payment method, click **Confirm Method**.
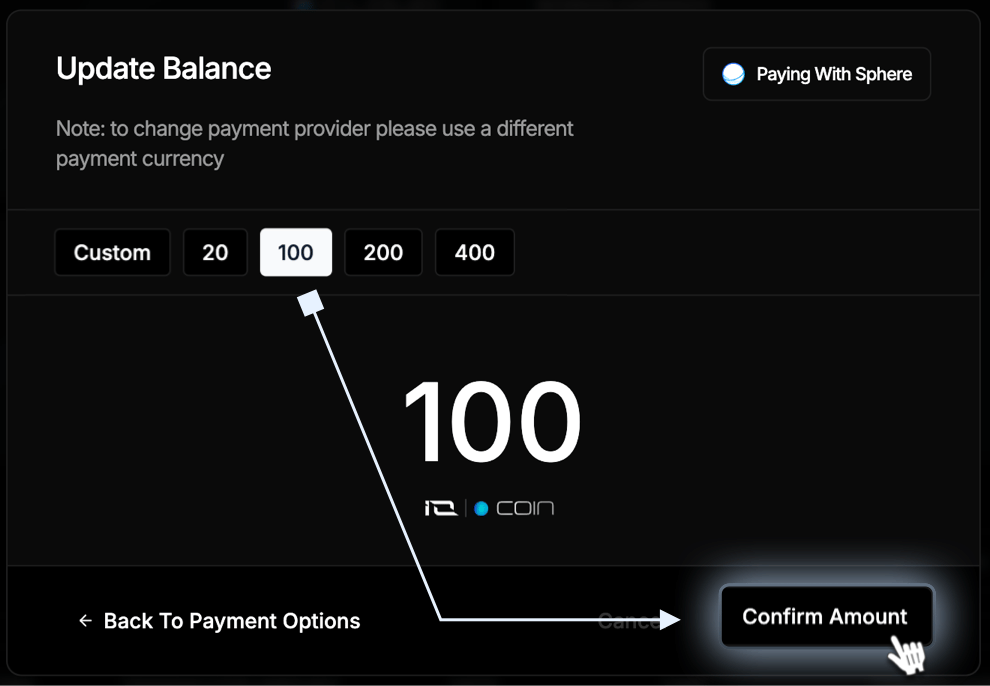
 4. On the **Set Amount** dialog, you can select **Custom** and enter any amount, or select the values to the right: **20, 100, 200, or 400** and click **Confirm Amount** and you are redirected to Spherepay to complete the transaction.
 #### 2. Select Payment Method - \$IO Coin
1. You are redirected to Spherepay to complete the transaction.
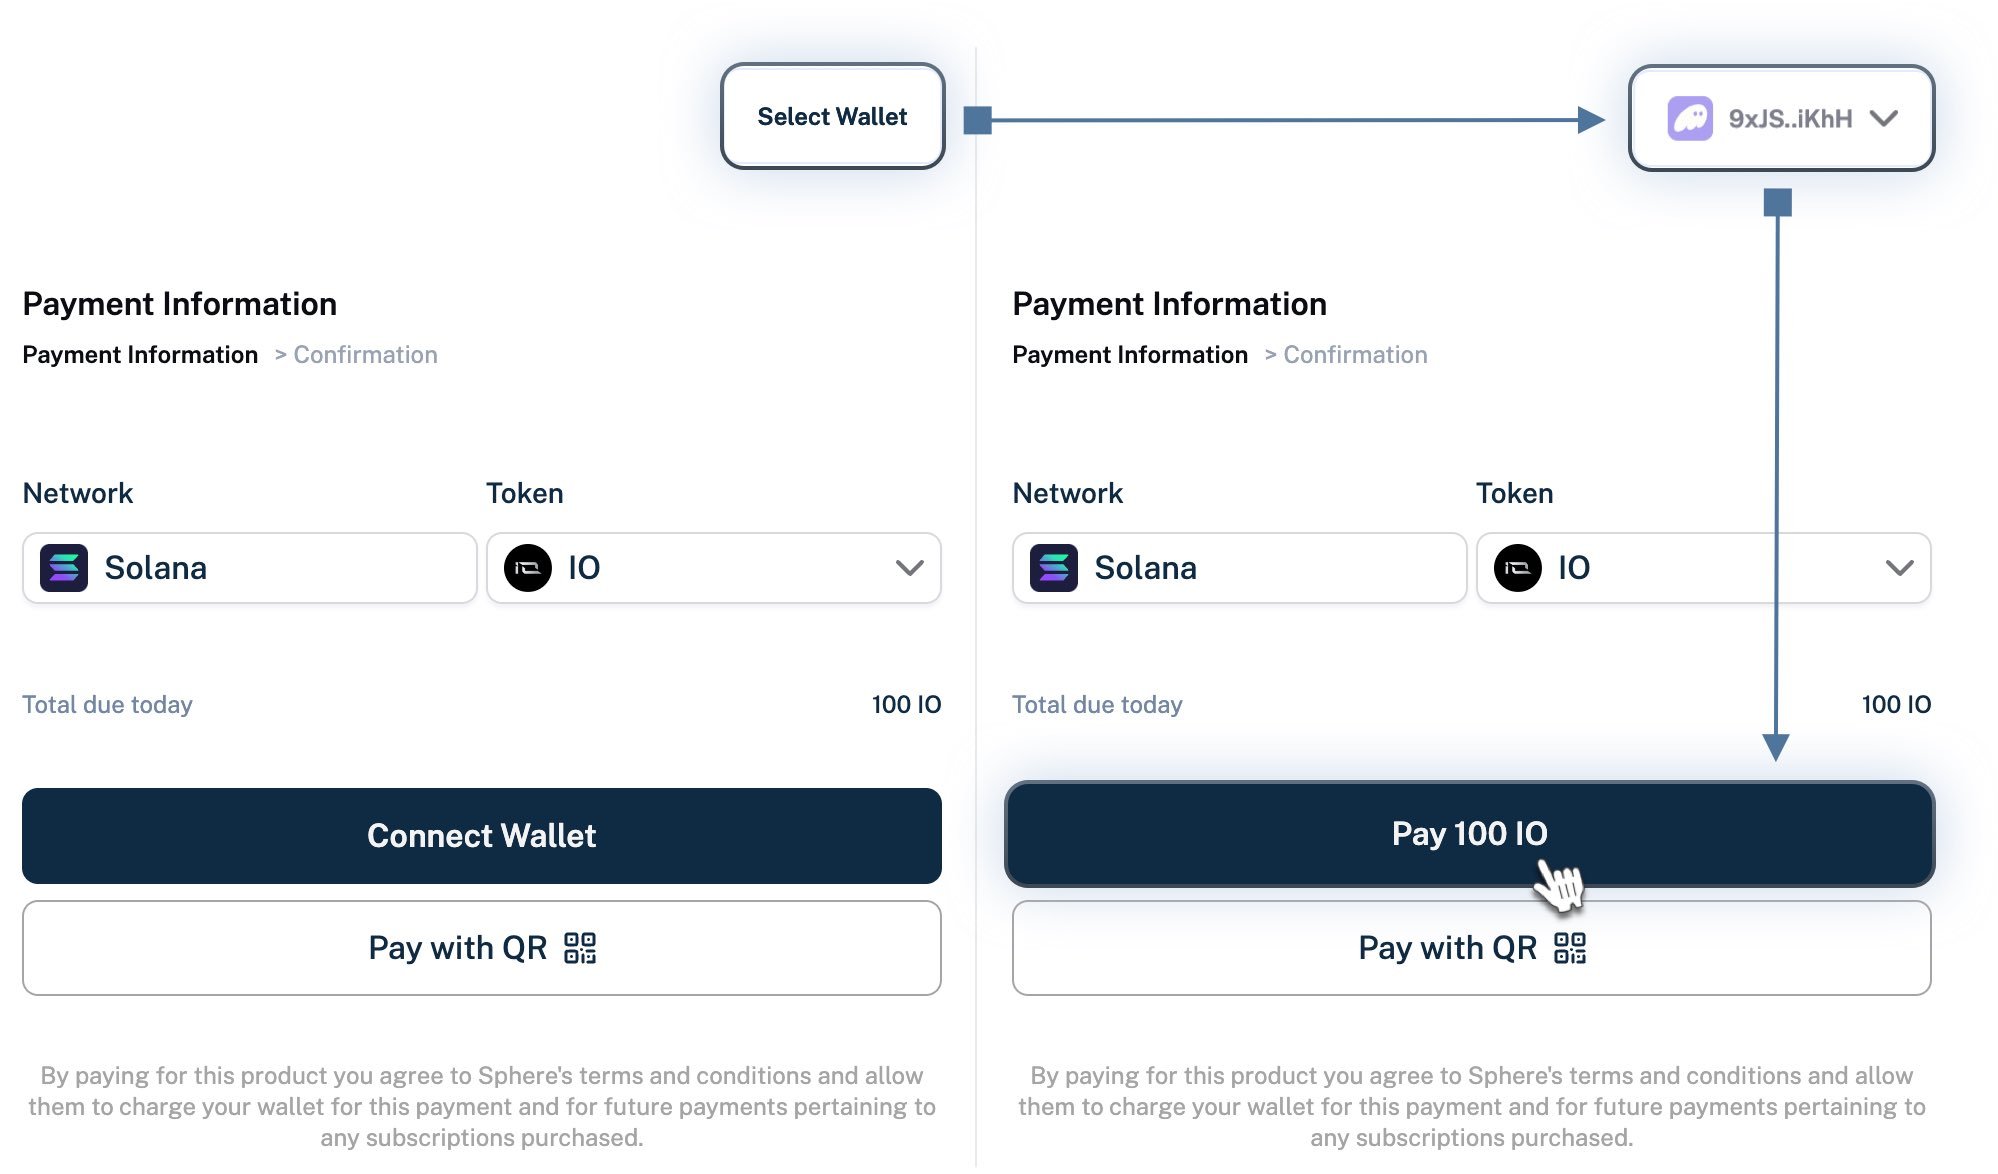
2. To connect your wallet, you can click **Select Wallet** or **Connect Wallet**.
3. When the wallet will be connected **Click Pay** with **\$IO Coin**
#### 2. Select Payment Method - \$IO Coin
1. You are redirected to Spherepay to complete the transaction.
2. To connect your wallet, you can click **Select Wallet** or **Connect Wallet**.
3. When the wallet will be connected **Click Pay** with **\$IO Coin**
 #### 3. Connect Wallet
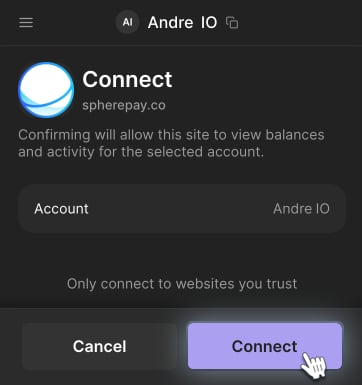
1. If you have a wallet, Spherepay may detect it. Scroll to browse and **select your wallet** if undetected. (Image below is a truncated list).
#### 3. Connect Wallet
1. If you have a wallet, Spherepay may detect it. Scroll to browse and **select your wallet** if undetected. (Image below is a truncated list).
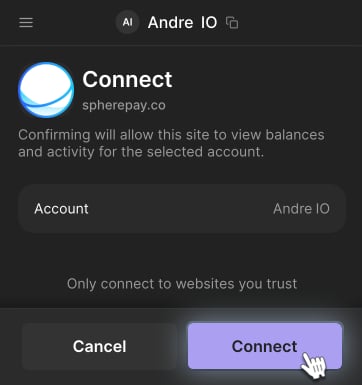
 2. Click **Connect**.
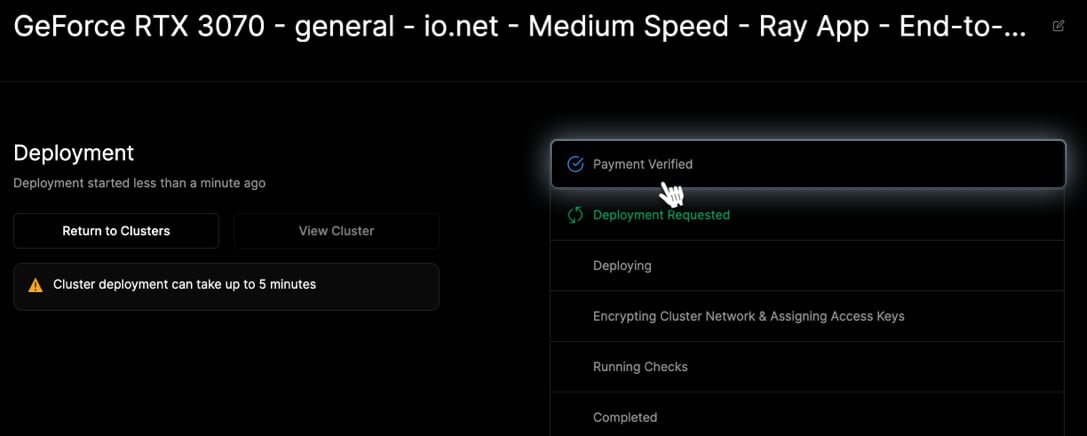
 3. After you complete the transaction, wait until your cluster is **successfully deployed.**
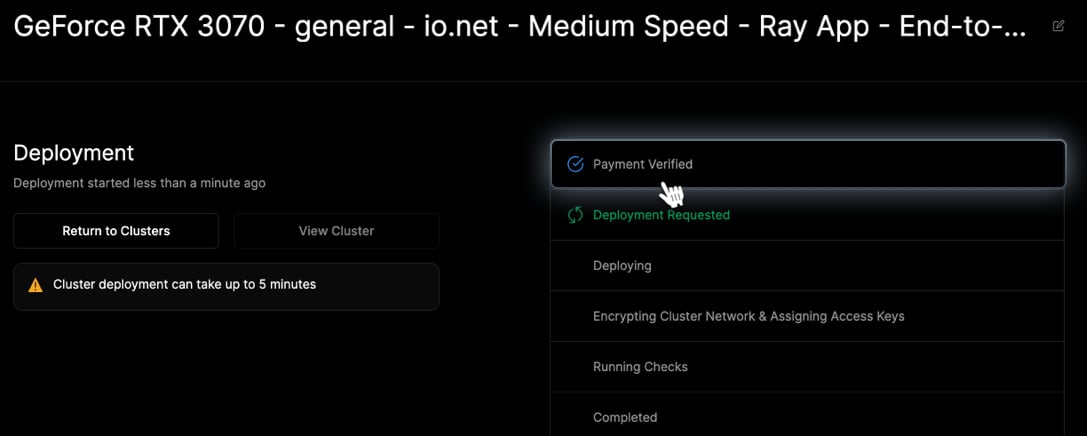 4. Click **View Cluster** to view the details of your deployed cluster.
### Deploy Cluster and Pay with USDC Crypto
If you don't have any funds in your account, you can still deploy a cluster and pay for it at the end of the process. In this example, we pay with **USDC crypto**.
Users can no longer use their Cloud USDC Balance to deploy clusters. Even if your account shows a positive Cloud USDC Balance, you must make a separate direct payment via USDC crypto for each cluster deployment.
#### 1. Pay
1. Complete the steps to deploy a cluster, and on the final Summary step, select **Pay with USDC**.
4. Click **View Cluster** to view the details of your deployed cluster.
### Deploy Cluster and Pay with USDC Crypto
If you don't have any funds in your account, you can still deploy a cluster and pay for it at the end of the process. In this example, we pay with **USDC crypto**.
Users can no longer use their Cloud USDC Balance to deploy clusters. Even if your account shows a positive Cloud USDC Balance, you must make a separate direct payment via USDC crypto for each cluster deployment.
#### 1. Pay
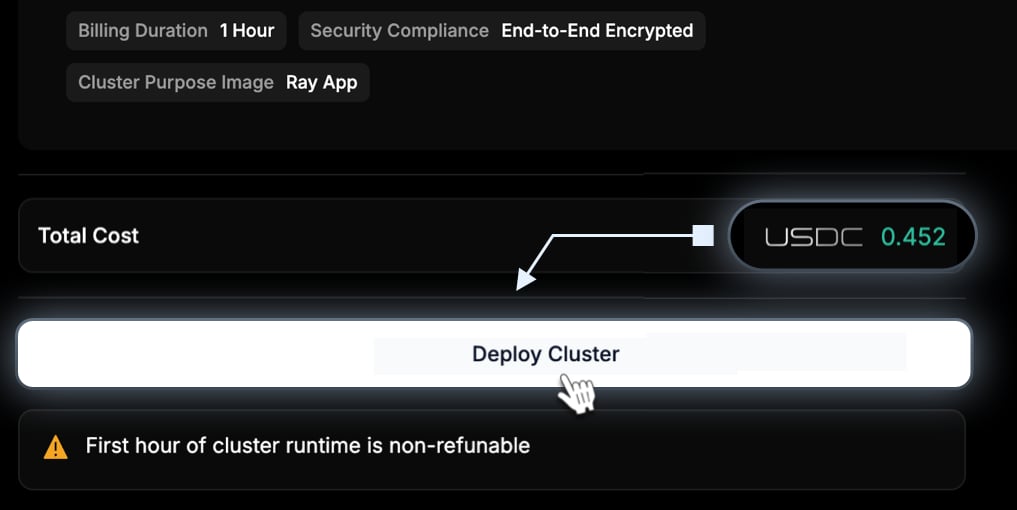
1. Complete the steps to deploy a cluster, and on the final Summary step, select **Pay with USDC**.
 Check the cost in USD and click **Deploy Cluster**.
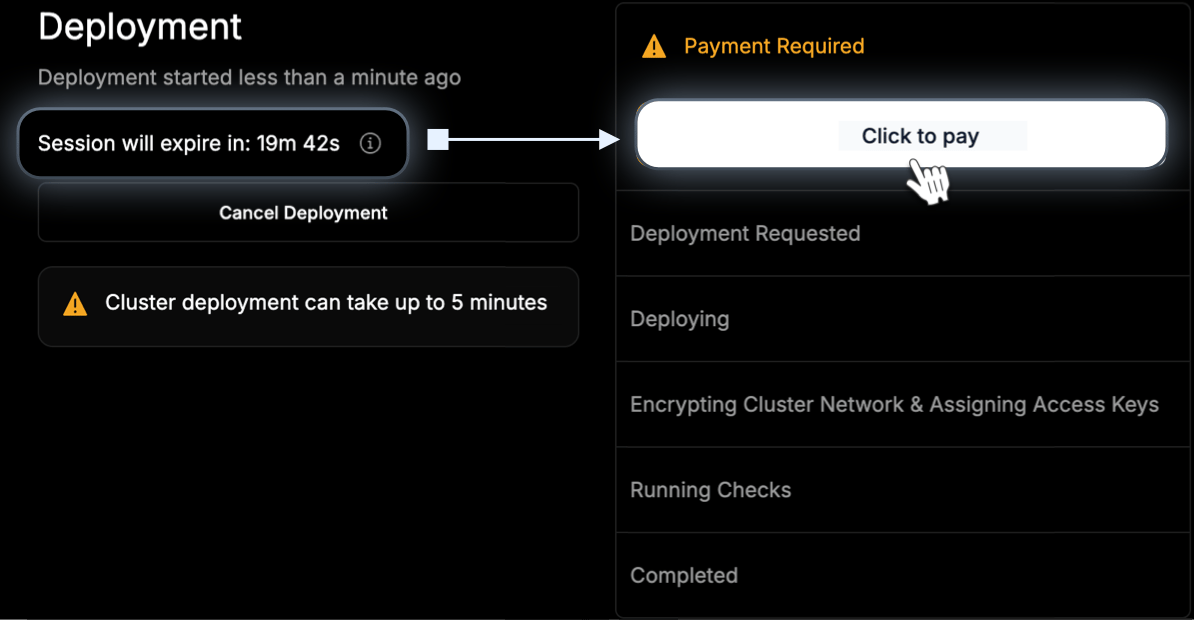
 2. At the end of the deploy process, click **Click to pay** button. Please note that if payment isn't completed **within 20 minutes**, the cluster creation session will end, and the **cluster will be destroyed**. You'll then be redirected to the previous step to confirm the details and create the cluster again.
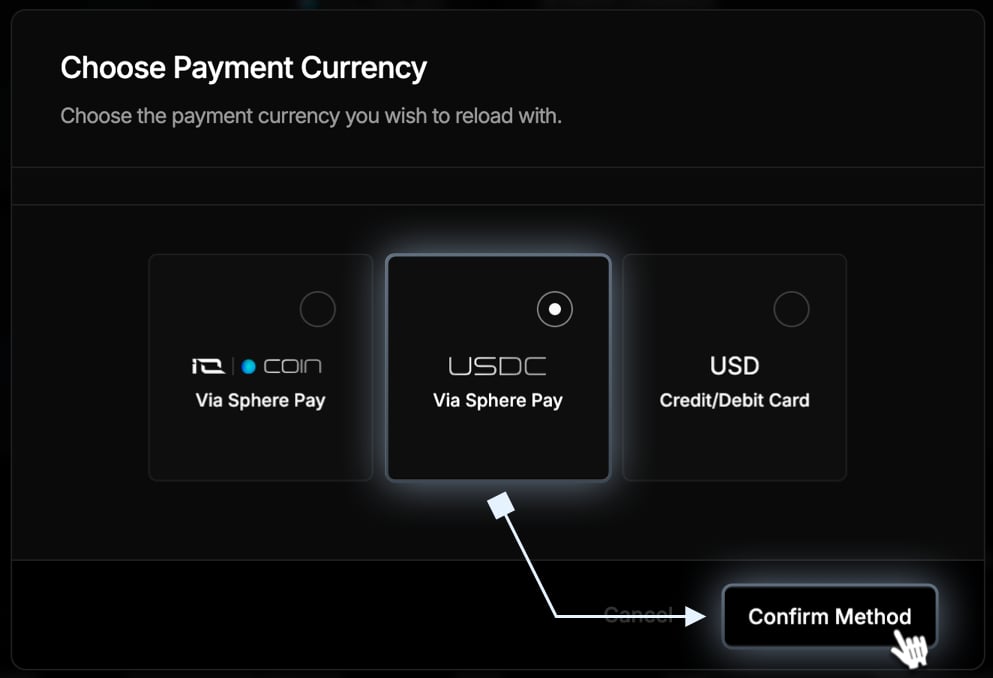
 3. In the **Payment Currency** dialog, you select **USDC** (via Sphere Pay). After selecting your payment method, click **Confirm Method**.
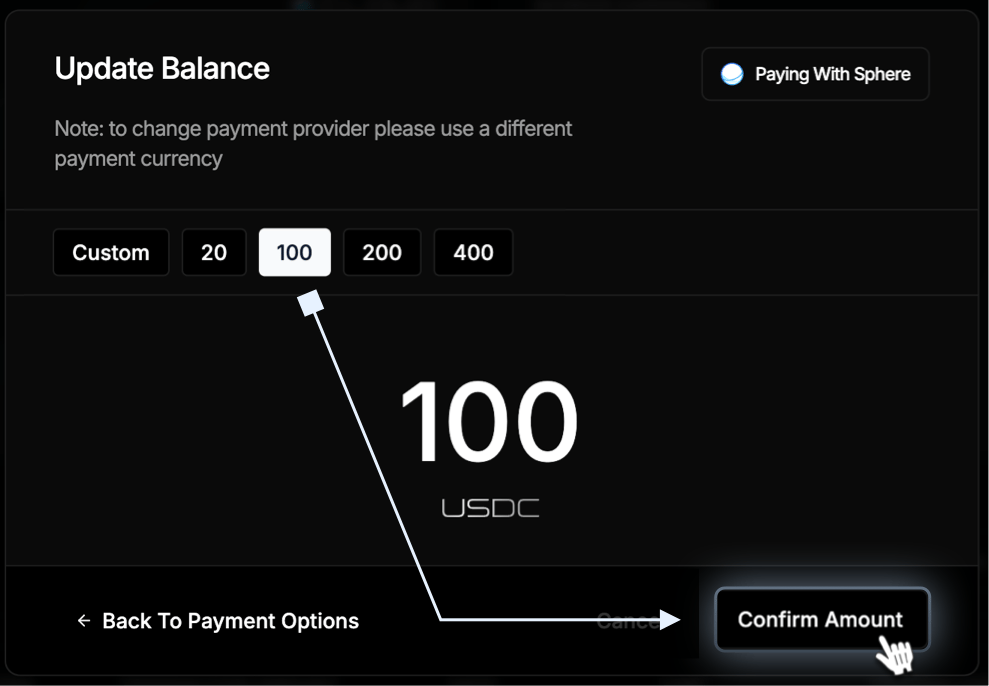
 4. On the **Set Amount** dialog, you can select Custom and enter any amount, or select the values to the right: **20, 100, 200, or 400** and click **Confirm Amount** and you are redirected to Spherepay to complete the transaction.
 #### 2. Select Payment Method - USDC Token
1. You are redirected to **Spherepay** to complete the transaction.
2. To connect your wallet, you can click **Select Wallet** or **Connect Wallet.**
3. When the wallet will be connected **Click Pay** with **USDC**
#### 2. Select Payment Method - USDC Token
1. You are redirected to **Spherepay** to complete the transaction.
2. To connect your wallet, you can click **Select Wallet** or **Connect Wallet.**
3. When the wallet will be connected **Click Pay** with **USDC**
 #### 3. Connect Wallet
1. If you have a wallet, Spherepay may detect it. Scroll to browse and **select your wallet** if undetected. (Image below is a truncated list).
#### 3. Connect Wallet
1. If you have a wallet, Spherepay may detect it. Scroll to browse and **select your wallet** if undetected. (Image below is a truncated list).
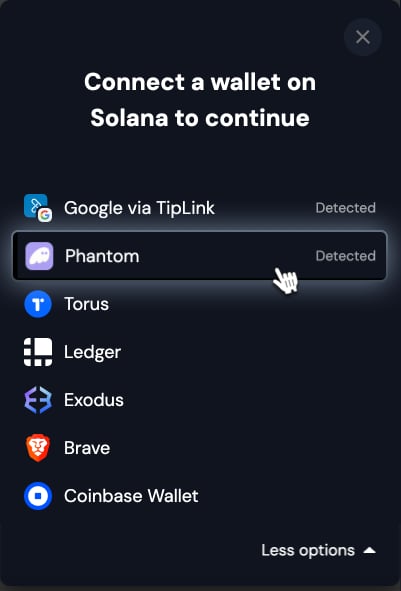 2. Click **Connect**.
 3. After you complete the transaction, wait until your cluster is **successfully deployed**.
 4. Click **View Cluster** to view the details of your deployed cluster.
### Deploy Cluster and Pay with Fiat
If you don't have any funds in your account, you can still deploy a cluster and pay for it at the end of the process. In this example, we pay with a credit card.
1. Complete the steps to deploy a cluster, and on the final Summary step, select **Pay with USDC**.
4. Click **View Cluster** to view the details of your deployed cluster.
### Deploy Cluster and Pay with Fiat
If you don't have any funds in your account, you can still deploy a cluster and pay for it at the end of the process. In this example, we pay with a credit card.
1. Complete the steps to deploy a cluster, and on the final Summary step, select **Pay with USDC**.
 Check the cost in USD and click **Deploy Cluster**.
 2. At the end of the deploy process, click **Click to pay** button. Please note that if payment isn't completed **within 20 minutes**, the cluster creation session will end, and the **cluster will be destroye**d. You'll then be redirected to the previous step to confirm the details and create the cluster again.
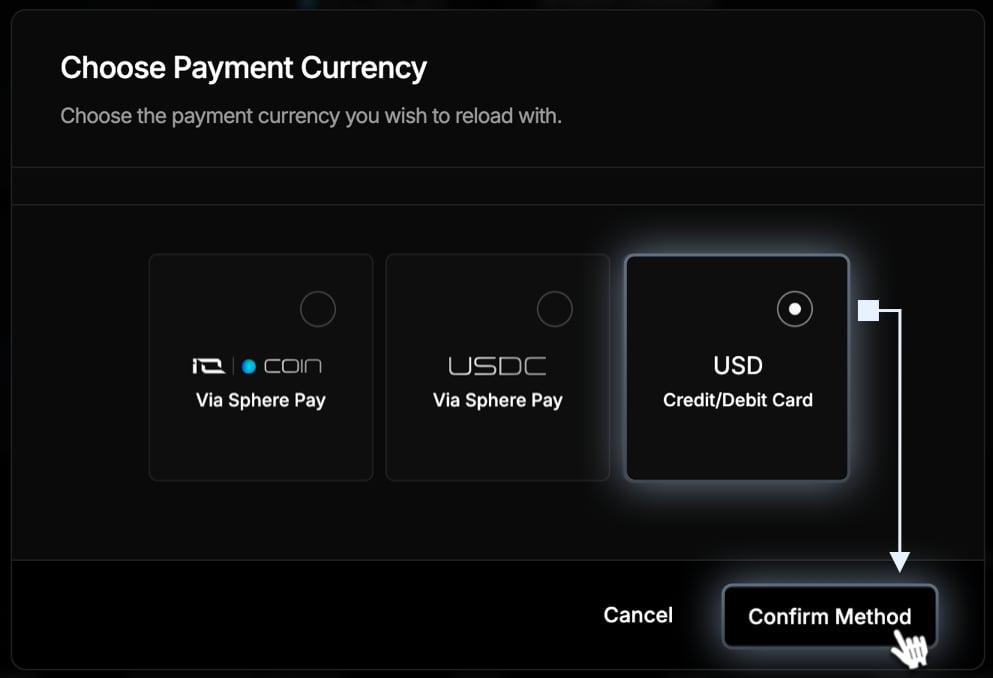
 3. In the **Payment Currency** dialog, you select **USD** (Credit/Debit card). After selecting your payment method, click **Confirm Method**.
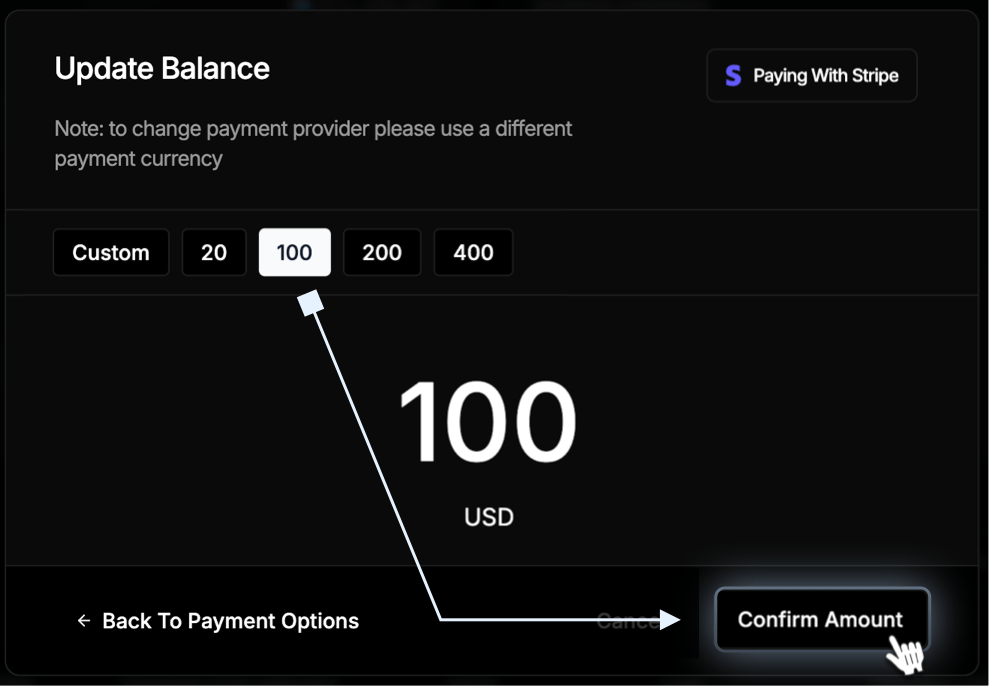
 4. On the **Set Amount** dialog, you can select Custom and enter any amount, or select the values to the right: **20, 100, 200, or 400** and click **Confirm Amount** and you are redirected to **Stripe** to complete the transaction.
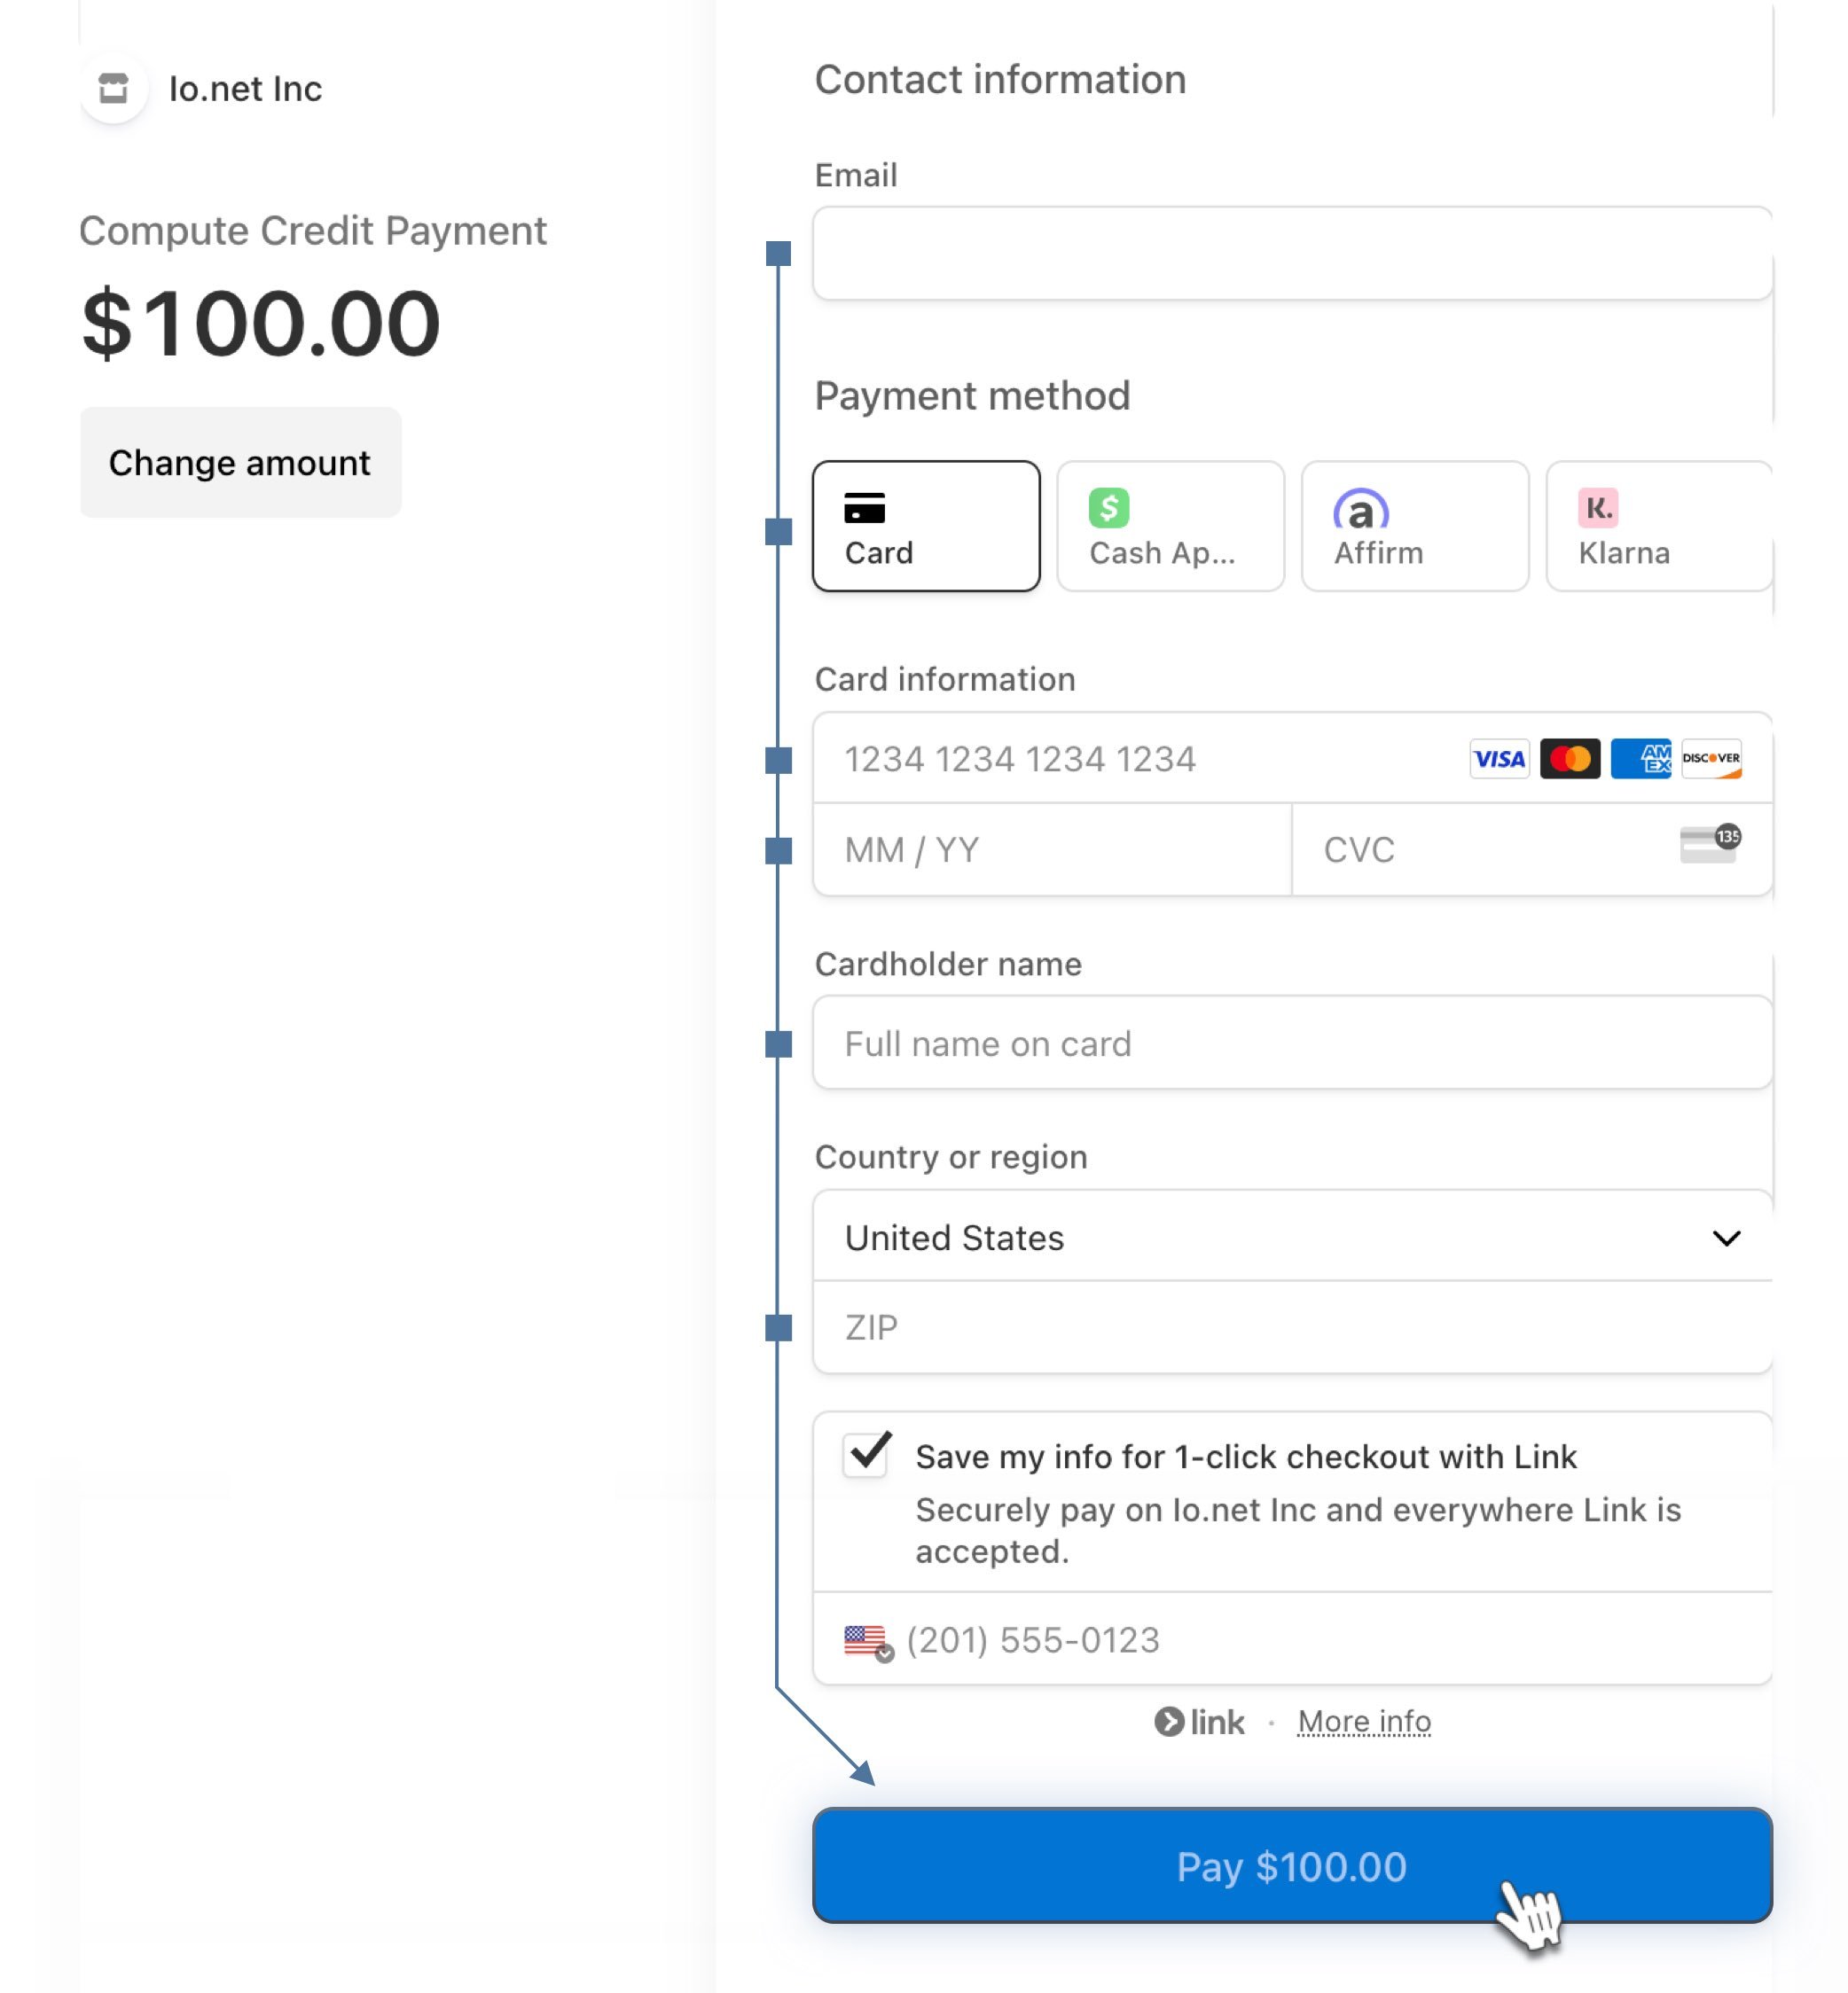
 5. Select **Card** in the Payment method section. Enter your credit card information and click Pay.
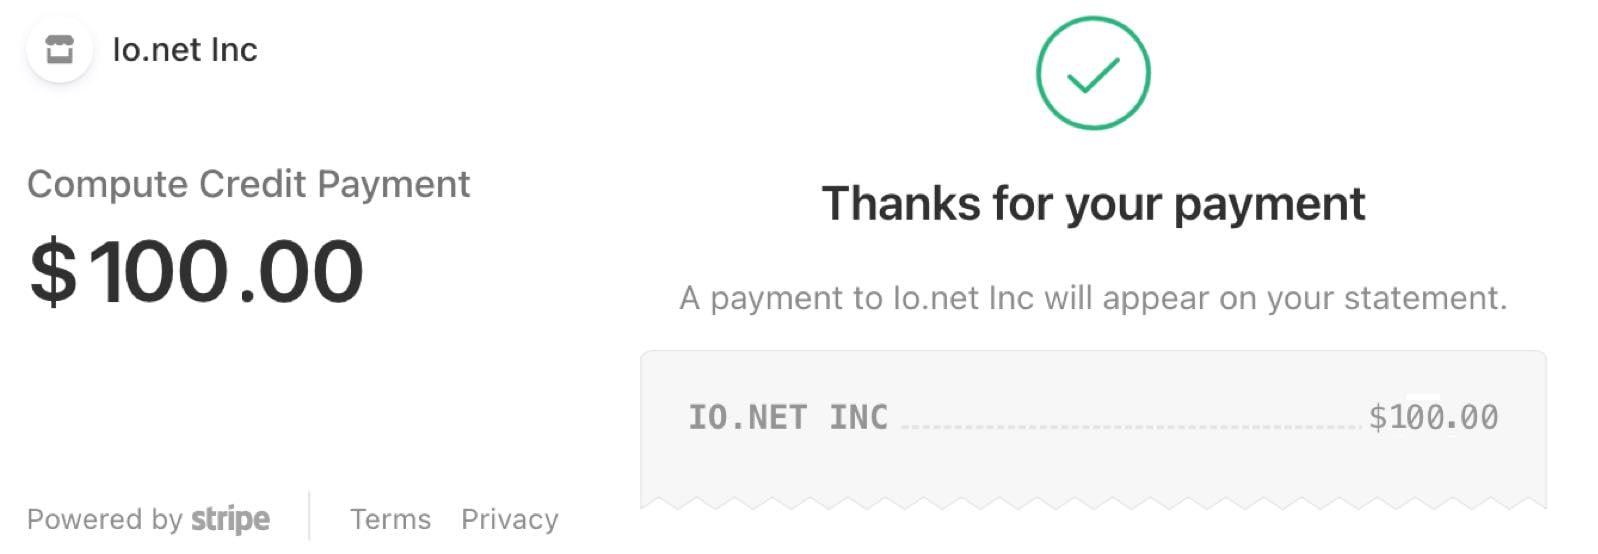
 6. After your payment is processed, a confirmation appears.
 7. Return to the tab with your cluster. Payment Verified is checked and the cluster is in the **deployment process**. Click **View Cluster** to view the details of your deployed cluster.
